Onboarding Hub - Step 16 Customer Notifications [to complicated for new users replacing with simple option - leave to phase 2]
Customer Tracking Notifications (email/sms)
This article outlines the setup of three common export rules used to notify customers of delivery updates: a status export for On Delivery notifications, a status export for Delivered notifications, and a POD export to send proof of delivery upon completion.
Page URL:
How To
On Delivery Notifications
To begin, navigate to the above Page URL which is located under Import/Export > Data Export > Status Updates:

This section of Transvirtual allows the configuration of status exports that send notifications to customers when consignments change to On Delivery. This provides near real-time visibility of when freight has been loaded onboard and an indication of when delivery can be expected.
Click New Rule:
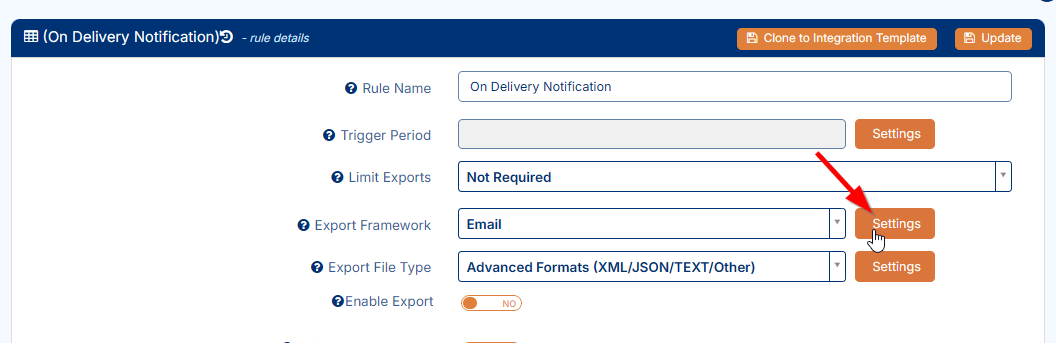
Name accordingly and choose the Export Framework desired:
The Export Framework is the method in which Transvirtual will send the data - if email is chosen, an email will be sent to the nominated recipients.
Once created, the export rule will appear in the grid. Click on it to expose additional settings on the right:
Start with the Data Filter seen at the bottom.
For On Delivery Notifications, use the inbuilt Data Filter builder:
There are 3 steps when using this dropdown - each step requires a value selection and then clicking Next/Add Rule.
To configure for On Delivery tracking, setup a filter like so:
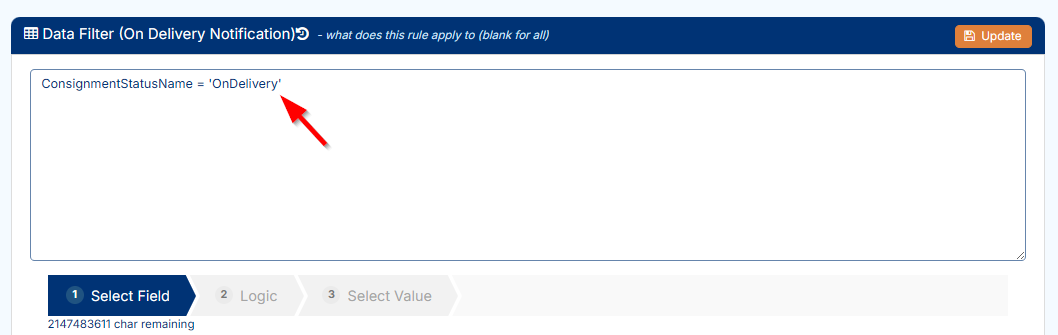

The Data Filter determines when an export is triggered and which consignments it applies to. In this example, the export triggers only when a consignment changes status to On Delivery, at which point an email is sent to the nominated recipients.
Next, configure the Export Framework Settings:
This section allows the export email content to be customized and the recipients for each notification to be configured.
Send to Customer Contact enables a variable setup where each triggered consignment sends an email only to the customer contact associated with that consignment’s customer card.

Use this exact text @Model.ConsignmentNumber to variably populate the consignment each time the rule triggers against a consignment!
Once setup, enable the rule to activate and start using it.
For additional setup help, please click here.
For additional setup help, please click here.
Delivered Notifications
The configuration for these notifications is almost identical to the On Delivery notifications above, with only a minor change to the data filter required. A new rule must be configured.
Navigate to the above Page URL which is located under Import/Export > Data Export > Status Updates.
Click New Rule and name accordingly:
Once created, the export rule will appear in the grid. Click on it to expose additional settings on the right:
Start with the Data Filter seen at the bottom.
For Delivered Notifications, use the inbuilt Data Filter builder:
There are 3 steps when using this dropdown - each step requires a value selection and then clicking Next/Add Rule.
To configure for Delivered tracking, setup a filter like so:
Next, configure the Export Framework Settings:
Send to Customer Contact enables a variable setup where each triggered consignment sends an email only to the customer contact associated with that consignment’s customer card.
Use this exact text @Model.ConsignmentNumber to variably populate the consignment each time the rule triggers against a consignment!Once setup, enable the rule to activate and start using it.
For additional setup help, please click here.
POD Tracking
To begin, navigate to the above Page URL which is located under Import/Export > Data Export > Proof of Delivery:
This section of Transvirtual allows the configuration of Proof of Delivery (POD) exports that send notifications to customers when consignments are delivered. This provides near real-time visibility of when freight has been delivered.
Click New Rule and name accordingly:
The Export Framework is the method in which Transvirtual will send the data - if email is chosen, an email will be sent to the nominated recipients.
Once created, the export rule will appear in the grid. Click on it to expose additional settings on the right:
Start with the Data Filter seen at the bottom.
For POD Notifications, use the inbuilt Data Filter builder:
There are 3 steps when using this dropdown - each step requires a value selection and then clicking Next/Add Rule.
To configure for POD tracking, setup a filter like so:
Next, configure the Export Framework Settings:
This section allows the export email content to be customized and the recipients for each notification to be configured.
Send to Customer Contact enables a variable setup where each triggered consignment sends an email only to the customer contact associated with that consignment’s customer card.
Use this exact text @Model.ConsignmentNumber to variably populate the consignment each time the rule triggers against a consignment!
Next, configure the Export File Type:
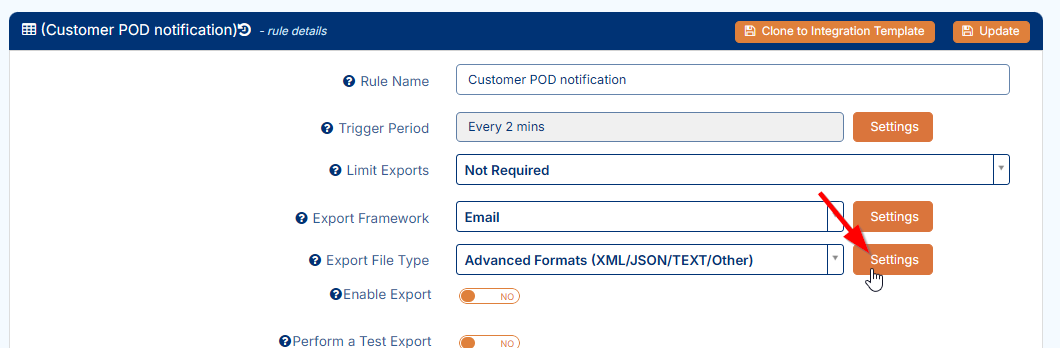
Toggle the highlighted to YES which will send the POD images + signatures - click Update to save.
Choose File Type NONE and click Update:
This will allow for just the sending of the POD images with no other files.
Once setup, enable the rule to activate and start using it.
For additional setup help, please click here.
FAQs
Q: Can I send tracking notifications via SMS rather than Email?
Yes, this can be easily achieved by setting the Export Framework to SMS on the relevant export rule:

This requires SMS funds against the account in order to work as each export will incur a cost per SMS!
Additional setup info for this can be found in the below Related help links.
Related Articles + Videos
Please see below links that provide more information on the content of this help article:
- https://support.transvirtual.com/portal/en/kb/articles/proof-of-delivery-edi-export
- https://support.transvirtual.com/portal/en/kb/articles/status
Related Articles
Onboarding Hub - Step 30 Customer Tracking Options
Tracking Consignment for Customers This article will explain how to configure tracking notifications for customers. Page URL: Export Consignment Status Updates Export PODs How To This is largely explained in the workflows listed here: Link Further ...Onboarding Hub - Step 10 Barcodes [add later/phase 2]
Barcode Formats This article will explain how to configure Barcode Formats and detail their purpose. Page URL: Barcode format rules How To To begin, navigate to the above Page URL which is located under Configuration > General > Barcode Formats: This ...Onboarding Hub - Step 15 Driver Alerts [add later/phase 2]
Mobile Driver Alerts This article explains how to configure mobile alerts and their use in Transvirtual. Page URL: Mobile Alerts How To To begin, navigate to the above Page URL which is located under Configuration > General > Mobile Driver Alerts: ...Onboarding Hub - Step 9 Scan Tags [add later/phase 2]
Setup Your Scan Tags This article explains how to configure Scan Tags and details their purpose. Page URL: Freight Scan Overrides Dictionary List How To To begin, navigate to one of the above Page URLs which are located under either Configuration > ...Depot/Hub Processes
Depot/Hub Processes This article explains how to mark freight as arrived at the depot after a pickup or linehaul has been completed. Overview Using the mobile app, scan consignment items as they arrive at the depot to mark them as In Depot and update ...