Onboarding Hub - Step 5 Headports (Depots/Warehouses)
Setting up Your Headports
This article explains how to setup headports in an account and why they are important for use in Transvirtual.
Page URL:
How To
To begin, navigate to the above Page URL which is located under Configuration > Lists and Zones > Zone List Directory:
This section of Transvirtual allows you to create Zone Lists, which group suburbs into defined zones. Zone Lists can be used for purposes such as area-based pricing and as covered in this article, Headports.
Headports can represent both an area your business services, and are also a list of locations your business operates from.

Headports are used across various system reports and features, including the assignment of staff to specific work locations. They play a crucial role in many core areas of the system.
To create a new list, click the 'New Zone Listing' button:
A popup will then appear where the zone list name is to be entered:
Once created, the zone list will appear in the grid:
Per the above, click the newly created zone list and then Edit Zones/Suburbs. This will open up the zone list where the relevant zones can be defined.
To create a zone, there are 2 general methods which are detailed below.
Manual Zone Creation
Zones can be manually created by clicking New Zone:
From here, enter the zone name and click Save to create:
The new zone will appear on the left.
The next step is to add the relevant suburbs/postcodes to this zone.
Click the Zone from the list and then click either of the below options:
Rules by Postcode allows the zone to be created purely from postcode values if direct suburb information is not known or required.
To add using postcode values, click the Rules by Postcode tab and then click New Rule:
To add using postcode values, click the Rules by Postcode tab and then click New Rule:
Add postcodes individually:
Or as a range:
Suburbs belonging to a postcode added will become part of this zone.
If adding using suburb level information, click Rules by Suburb instead:
Clicking this tab will present a list of suburbs.
To add to the currently selected zone (Adelaide for this example), search for a suburb, then right click and add to zone:
Doing so will add the selected suburb to the zone previously clicked on and as shown at the top:
Repeat this process as needed for each zone in the list.
Import Creation
As an alternative to the above, zone lists can be created by importing a csv file.
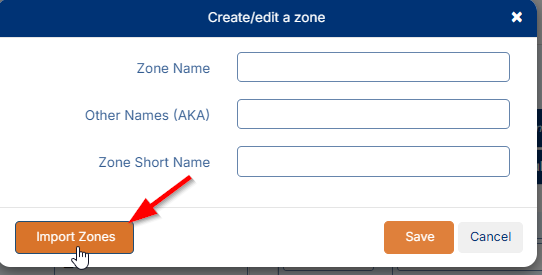
Click New Zone, then Import Zones:
The layout of the file required needs to include columns of information on Zone Name, Suburb included in zone + Postcode and State for the listed suburb.
The layout of the file required needs to include columns of information on Zone Name, Suburb included in zone + Postcode and State for the listed suburb.
An example import file is shown below:
Each row should be unique per suburb.
To import, click the import field and select the relevant import file:
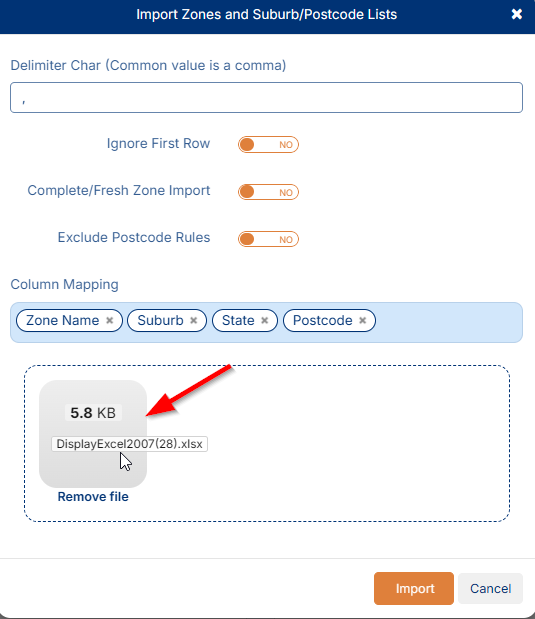
Map the columns according to what they relate to in Transvirtual:
The mapping should correlate to the file being imported - i.e. if column A is for Zone name, the first mapping field should be Zone Name.

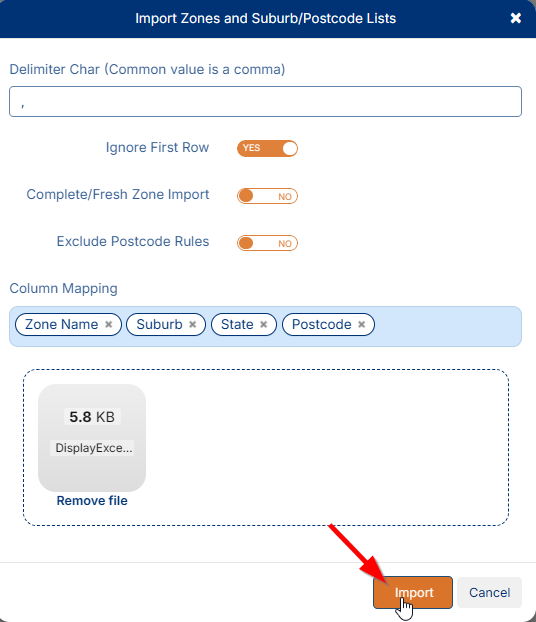
If the import file contains a heading row (column headers), set YES for 'Ignore First Row'.
Click Import to initiate and complete the import process:
The result of the file import will be shown within Transvirtual:
Additional Setup Required
The above illustrates how to configure the zone list itself but upon creation, there is an additional step that must be undertaken to ensure the system recognizes this list as the Headports list for the account.
Navigate to this page Settings located under Configuration > General > Global Setup > General Tab:
Navigate to this page Settings located under Configuration > General > Global Setup > General Tab:
Double-click the Headport Zone List field, select the zone list previously created for the account’s Headports, and then click Save.
This will activate the selected zone list as the designated Headports zone list for the account.

If the Headports list does not appear as an option, wait 20 minutes, refresh the browser and try again as some caching exists around zone list uploads in Transvirtual.
FAQs
Q: What are Headports actually used for in Transvirtual?
As noted above, Headports are used across various areas of the system, including reporting. Transvirtual provides a wide range of out-of-the-box reports that can display information such as profit and loss by zone and shipment volumes per zone, using the zones defined in the account’s Headport list.
Headports are also important for assigning staff to their work locations. For example, a user may operate from the Sydney depot. A Headport can be set on each staff member’s profile, allowing the system to perform various functions—one of which is displaying the scan location for any scans performed via the mobile app. For instance, when a Sydney depot staff member scans freight, the system will show that the consignment was scanned at the Sydney depot, which is useful for accurate customer tracking.
Q: Can I use my headport list for pricing zones as well?
Yes, however, most users find it necessary to further refine their delivery areas to ensure accurate pricing for their services. While it is possible to use the Headports zone list as the account’s pricing areas, this may not be advisable if a more detailed breakdown is needed or if individual customers have different service areas with distinct pricing structures.
Related Articles + Videos
Please see below links that provide more information on the content of this help article:
- https://support.transvirtual.com/portal/en/kb/articles/zone-directory#Zone_Directory
- https://www.loom.com/share/165055383051402b803cfea0f2ebe2f3
Glossary
Zone List: A Zone List is a collection of suburbs or areas grouped into defined zones within the system.
Zone: A Zone is a defined geographic area, typically made up of one or more suburbs or postcodes.
Related Articles
Onboarding Hub - Step 19 Description List
Description List This article will explain how to configure Description Lists to be used upon consignment creation. Page URL: Settings How To To begin, navigate to the above Page URL which is located under Configuration > General > Global Setup > ...Onboarding Hub - Step 28 Depot/Hub Processing
Process Freight Arriving Into Your Depot/Hub With The Mobile App This article explains how to mark freight as arrived at the depot after a pickup or linehaul has been completed. How To Using the mobile app, users can scan consignment items as they ...Onboarding Hub - Step 14 Vehicles
Vehicle List This article will explain how to configure vehicles within an account. Page URL: Vehicle List How To To begin, navigate to the above Page URL which is located under Transport > Configuration and Setup > Vehicle List: This section of ...Onboarding Hub - Step 12 Customers
Setup Your Customer List and Logins This article will explain how to configure customer cards and linked customer logins in an account. Page URL: Card Files How To To begin, navigate to the above Page URL which is located under Transport > ...Onboarding Hub - Step 11 User Logins
Setup Staff/User Logins This article will explain how to configure user logins within an account. Page URL: Card Files How To To begin, navigate to the above Page URL which is located under Transport > Configuration and Setup > Card Files ...