Onboarding Hub - Step 19 Description List
Description List
This article will explain how to configure Description Lists to be used upon consignment creation.
Page URL:
How To
To begin, navigate to the above Page URL which is located under Configuration > General > Global Setup > Consignment Related Rules Tab:
This section of Transvirtual allows freight descriptions to be configured. These descriptions are available for users to select when creating consignments, helping to accurately describe the freight being shipped.
Click Add Description:
Name accordingly and click Add:
The newly created description will appear in the list.
Default dimensions and weight values can be applied by double clicking and editing:
Descriptions entered here can now be utilized within the consignment creation screen under Transport > Operational Tasks > Consignments > Create New:
Descriptions with default dimension and weight values will populate the length, width, height and weight fields upon selection:

Unique Descriptions per customer
If suitable, Descriptions Lists can be customized per customer in the account.
Navigate to Transport > Configuration and Setup > Card Files (Customers/Suppliers/Staff) > Customers tab > Select customer card:
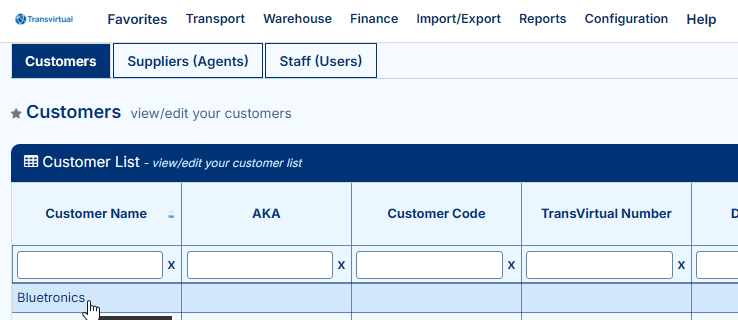
Navigate to Consignment Relates Rules tab and select the below:
Repeat the same steps outlined earlier to add descriptions as required.
If needed, descriptions can be deleted/removed for the customer by clicking the bin icon:
The descriptions listed here are the ones displayed to this customer when they are selected as the consignment customer during creation:
FAQs
Q: Can I import a Description List?
Yes, Descriptions Lists can be imported. Please refer to the below Related help links as they explain further.
Q: What is the difference between a Description vs Freight Item in Transvirtual?
In Transvirtual, descriptions are used to define the freight items for an account. They effectively act as alternative names for the freight being shipped. For example, an account may ship cartons, but users might select descriptions such as parcel, box, or container to represent the same underlying freight type.
Related Articles + Videos
Please see below links that provide more information on the content of this help article:
- https://www.loom.com/share/aade9a2f36404d5d925caff6891298e5
- https://support.transvirtual.com/portal/en/kb/articles/global-setup-17-10-2023
Related Articles
Onboarding Hub - Step 14 Vehicles
Vehicle List This article will explain how to configure vehicles within an account. Page URL: Vehicle List How To To begin, navigate to the above Page URL which is located under Transport > Configuration and Setup > Vehicle List: This section of ...Onboarding Hub - Step 5 Headports (Depots/Warehouses)
Setting up Your Headports This article explains how to setup headports in an account and why they are important for use in Transvirtual. Page URL: Zone List Directory How To To begin, navigate to the above Page URL which is located under ...Onboarding Hub - Step 12 Customers
Setup Your Customer List and Logins This article will explain how to configure customer cards and linked customer logins in an account. Page URL: Card Files How To To begin, navigate to the above Page URL which is located under Transport > ...Onboarding Hub - Step 11 User Logins
Setup Staff/User Logins This article will explain how to configure user logins within an account. Page URL: Card Files How To To begin, navigate to the above Page URL which is located under Transport > Configuration and Setup > Card Files ...Onboarding Hub - Step 28 Depot/Hub Processing
Process Freight Arriving Into Your Depot/Hub With The Mobile App This article explains how to mark freight as arrived at the depot after a pickup or linehaul has been completed. How To Using the mobile app, users can scan consignment items as they ...