Onboarding Hub - Step 8 Security Groups/Settings
Security Groups and Settings
This article explains how to configure an account’s Security Settings to provide different levels of access for account users.
Page URL:
How To
To begin, navigate to the above Page URL which is located under Configuration > General > Security Groups:

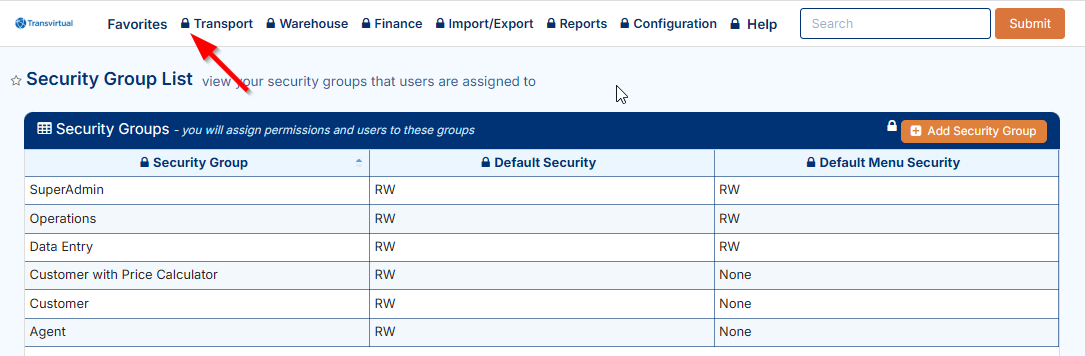
This section of Transvirtual allows Security Groups to be configured, defining the level of access granted to users within an account. A common example is a Customer Security Group, which typically allows customer users to create and search consignments where they are listed as the customer.
All new Transvirtual accounts are created with four default Security Groups: Customer, Agent, Operations, and SuperAdmin. Security Groups can be configured by editing one of these default groups or by creating a new group.
Editing an existing Security Group
Begin by clicking the dropdown shown below and selecting Enter Security Mode:
This will force a page reset whereby a series of padlocks against each field will then be present:
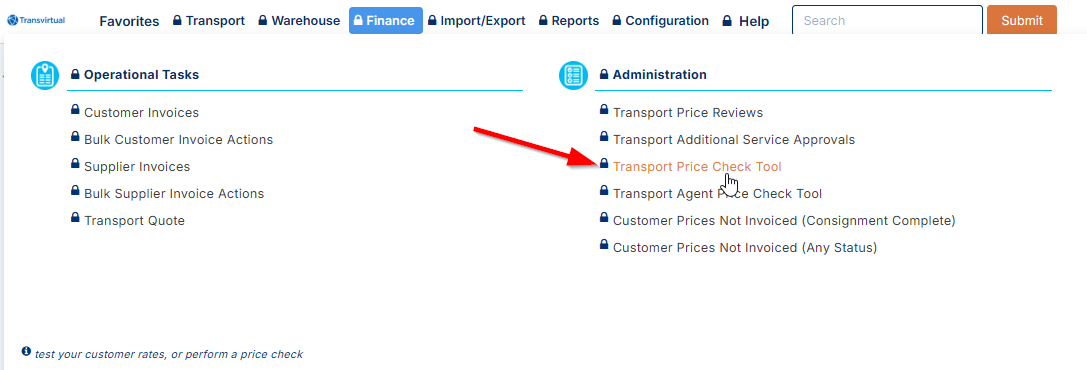
To modify access for a specific group, hover over the padlock next to the relevant field and set the access level for that group to NONE (if wanting no access for the group) or Read Write (if wanting access for the group). For example, granting the Customer Security Group access to the Price Calculator page allows them to obtain freight price quotes:
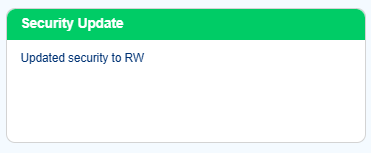
Once the access has been changed, a message box will appear on the page at bottom right to notify of update success:

There is caching around Security Settings which means updates will typically take 15-20 minutes to reflect.

To grant a group access to a page, permissions must be applied to all levels of the menu hierarchy from the top down. For example, providing the Customer Security Group access to the Transport Price Calculator page requires enabling access to the top-level Finance menu, then the Administration menu, and finally the Transport Price Calculator page itself.
Creating a Security Group
Begin by clicking Add Security Group:
Configure the Settings as required, then click Add to create. The below explains what each field here is used for:
Security Group: The name of the group - can be changed after creation.
Default General Security: This determines, for the pages a group has been granted access to in TransVirtual, what the default access level is—Read (view only) or Read/Write (view and make changes). Typically, Read/Write is recommended, as users only have access to pages they are authorized to view.
Default Menu Security (recommend NONE): This setting functions like the page-level access (from Default General Security) but applies to an entire menu. For example, if a group is set to Read/Write, for the Manifest menu, they will automatically have access to all pages within that menu, including any new pages added under that menu (e.g., Agent Manifest, Customer Manifest, General Manifest). It is strongly recommended to leave this setting as NONE for all groups, as page access should only be granted based on approved permissions.
Once created, the group will appear in orange in the grid on the left.
Adding users to a Security Group
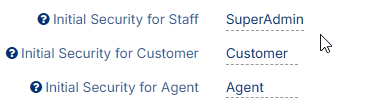
When a new login is created be that customer, agent or staff, Transvirtual will by default, add the user to an existing Security Group.
The group chosen for each user depends on the type of user they are.
To modify these default Security Groups, navigate to Configuration > General > Global Setup > General Tab > Other:
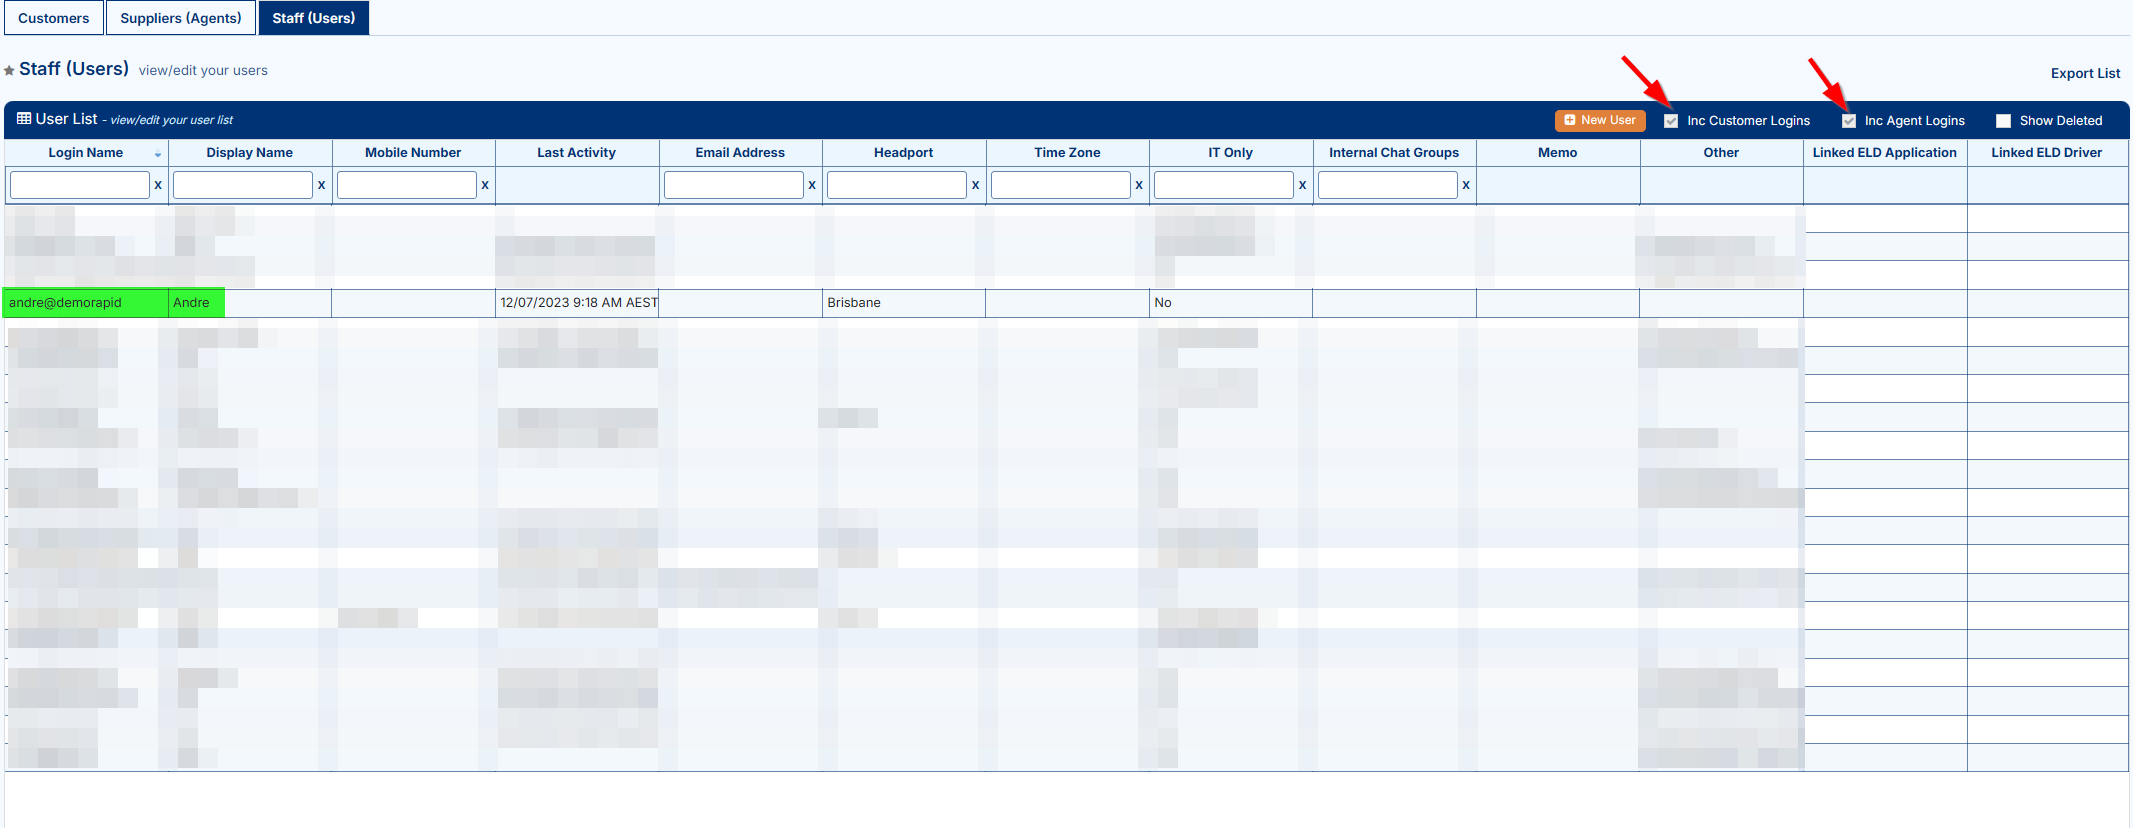
To modify a user's Security Group after login creation, navigate to their staff card under Transport > Configuration and Setup > Card Files (Customers/Suppliers/Staff) > Staff (Users) tab Double click the applicable user ensuring the checkboxes at top right are enabled if needing to see customer/agent logins:
Check the new Security Group required and deselect the previous one:

FAQs
Q: Can I add a user to multiple Security Groups?
Yes, users can be added to more than one Security Group; however, it is typically advised to only add each user to one group to avoid the potential for conflicting levels of access between multiple groups.
Q: How Can I test/check what a user has access to in my account?
There are 2 ways to do this:
There are 2 ways to do this:
- Enter Security Mode as outlined above and then hover over a padlock and impersonate a group like so:
The page will then refresh with the view as per that group's access to the account.
Disable the impersonation by following the same steps or by exiting Security Mode. - Create a login and assign it to the appropriate group as described above. Using a separate browser or an incognito/private window, log in to TransVirtual. This simulates the experience of a user in that group, displaying the access exactly as it would appear upon their login.
Related Articles + Videos
Please see below links that provide more information on the content of this help article:
Related Articles
Onboarding Hub - Step 11 User Logins
Setup Staff/User Logins This article will explain how to configure user logins within an account. Page URL: Card Files How To To begin, navigate to the above Page URL which is located under Transport > Configuration and Setup > Card Files ...Recommended Settings
Global Setup — Recommended Settings This article covers the recommended settings to configure when setting up a new Transvirtual account. These settings apply globally, meaning they affect all users and customers within the account. The specific ...Onboarding Hub - Step 12 Customers
Setup Your Customer List and Logins This article will explain how to configure customer cards and linked customer logins in an account. Page URL: Card Files How To To begin, navigate to the above Page URL which is located under Transport > ...Onboarding Hub - Step 4 Consignment Numbers
Personalize Your Consignment Numbers This article explains how to add a prefix to consignment numbers in a Transvirtual account and outlines why this is recommended. If you skip this step Transvirtual will just use a random starting number. Page URL: ...Onboarding Hub - Step 2 Contact Details
Add Your Contact Details This article explains how to add contact details to a Transvirtual account. These details are used across the platform — including on invoices and outgoing communications. Page URL: Settings Navigation: Configuration > ...